.png)
How to turn a scope document into a schedule in under one hour
Schedule Studio turns a scope document into a logically linked construction schedule in under one hour. Here's exactly what happens at each step - from uploading your documents to exporting to Primavera P6.
.jpg)
The short version
Upload scope documents, describe your project, review and shape your WBS and milestones, and Schedule Studio will generate a logically linked, construction-grade schedule in less than 60 minutes.
Key takeaways
- Schedule Studio extracts information from scope documents the way a planner or scheduler would: reading the page, not just the text
- The WBS is generated from your project description and documents, and you can bring your own WBS structure if you already have one, or edit what Schedule Studio generates before the schedule is built
- Custom milestones mean the schedule reflects your actual project structure, not a fixed set of defaults
- Schedule Studio first generates a high-level schedule. From there, you can expand individual activities for more detail, or expand the whole schedule at once
- If you already have an existing schedule for a similar project, you can upload it as a reference to improve durations, sequencing and accuracy from the start
- The schedule exports directly to Primavera P6 or MS Project
Schedule Studio takes project scope documents and produces a logically linked, construction schedule in under 60 minutes. Here’s how it works:
Step 1: Upload your documents and describe your project
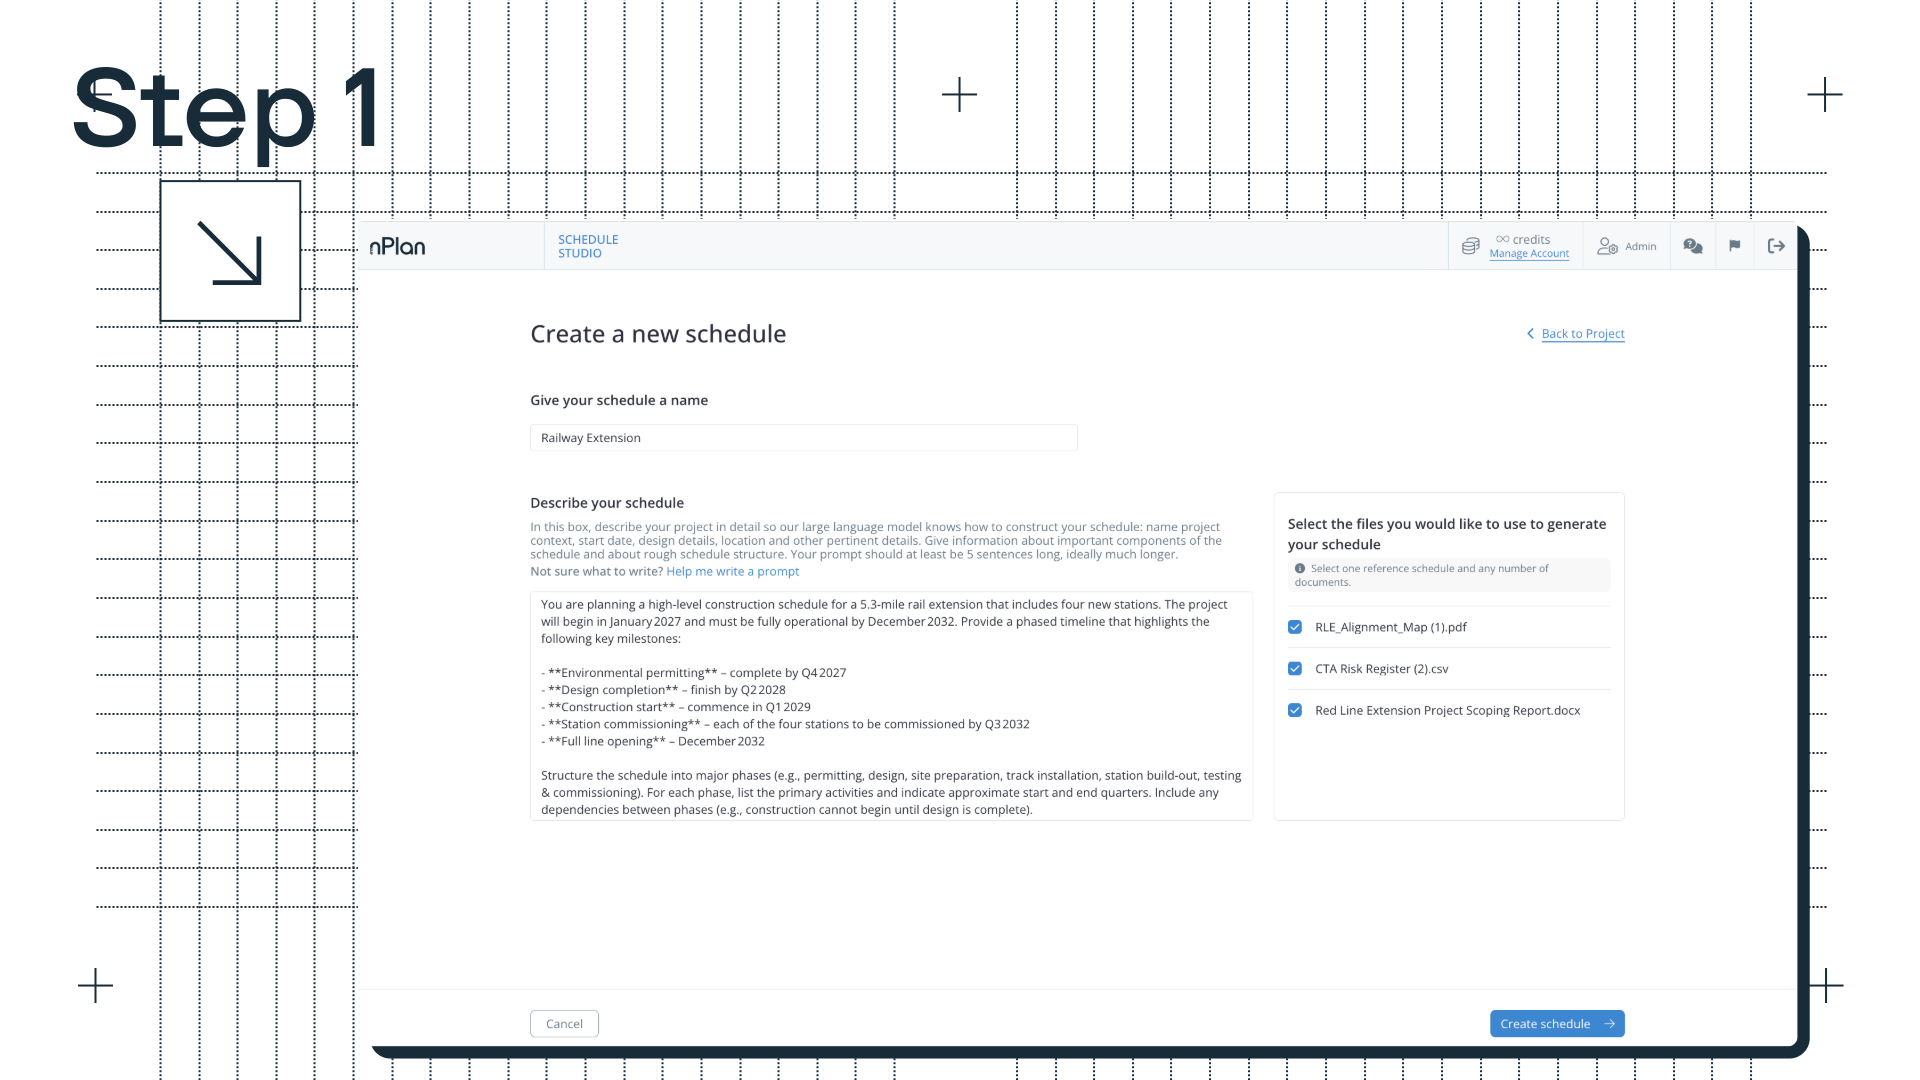
The process starts with two keyinputs: your documents and your prompt.
A typical scope document for a major project can be several hundred pages long. It contains text, tables, engineering drawings, scanned images, annotated diagrams and specifications, often across dozens of different formats. Standard AI-tool document processing strips out almost everything except plain text, and that means a substantial amount of key information is lost.
Schedule Studio works differently, it doesn’t just extract words - it reads full pages. The result is a structured set of project facts: scope objectives, key constraints, milestone requirements, delivery phases, site conditions, stakeholder dependencies.
Alongside the documents, you write a project description - a prompt - that describes what the project is, where it is, any key constraints, and the milestones that matter. The combination of uploaded documents and a detailed prompt produces the most accurate output. The more context Schedule Studio has to work with, the more closely the schedule reflects the actual project.
If you already have an existing schedule for a similar project, you can upload it as a reference. Schedule Studio uses your reference schedule to inform activity durations, improve sequencing logic, and produce an output that reflects how your projects actually run, rather than relying solely on its own data.
Step 2: Review and shape your WBS
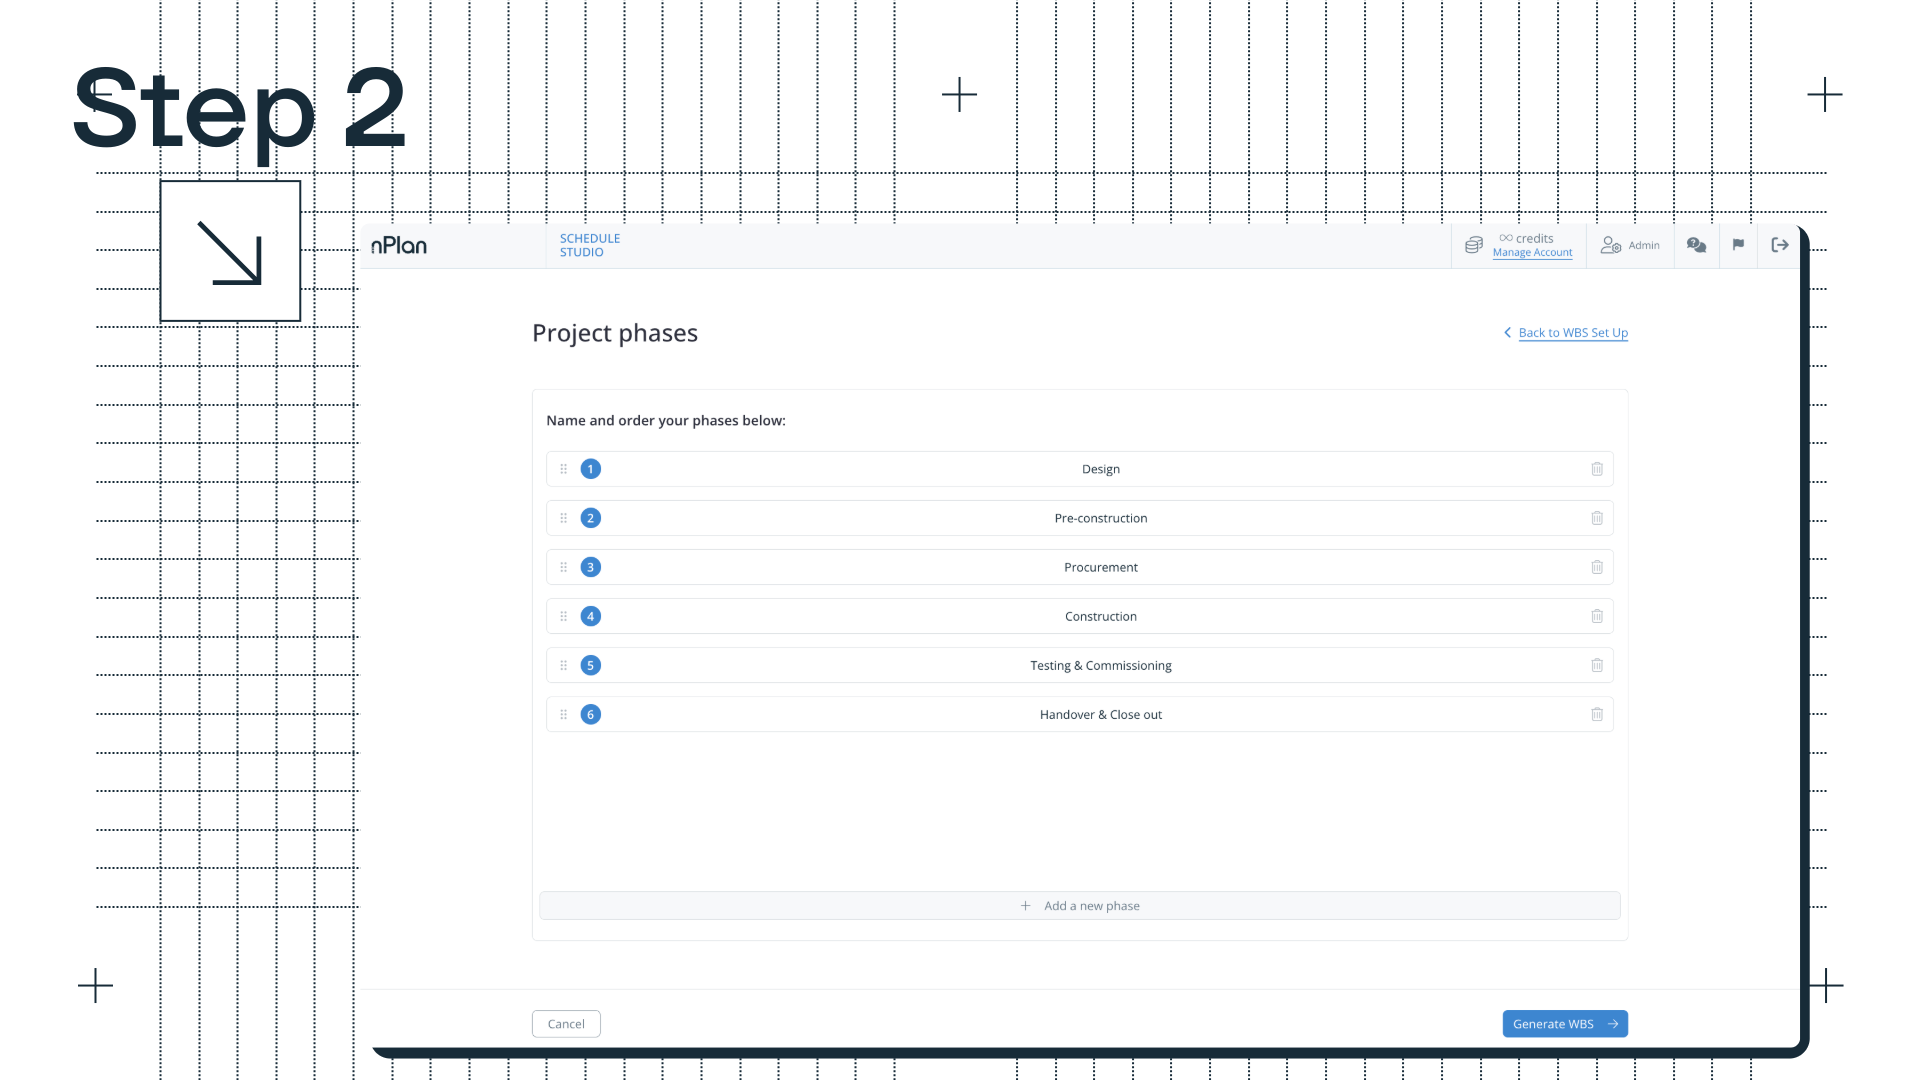
With the project facts established, Schedule Studio generates a work breakdown structure, working down the hierarchy from high-level phases to work packages to individual activities.
The model draws on nPlan’s huge dataset to understand what a credible WBS looks like for the project type and sector, then applies the specific facts from your documents and description to adapt it to the actual project. A substation project has a different structure to a highway project, and an offshore wind development looks different to an urban rail scheme. That domain knowledge is built-in to Schedule Studio, not improvised.
This is where you really get involved for the first time - the WBS step is a natural checkpoint: a summary of what Schedule Studio has understood about the project, and a direct opportunity to edit, add, remove or restructure before the schedule is built.
If you already have a WBS structure you want to use, you can bring it with you. Upload your own WBS and Schedule Studio will use it as the framework for the schedule it generates, rather than building one from scratch. This is useful if you have established templates for a project type, or if the client has a specific breakdown structure that you need to follow.
Step 3: Define your milestones
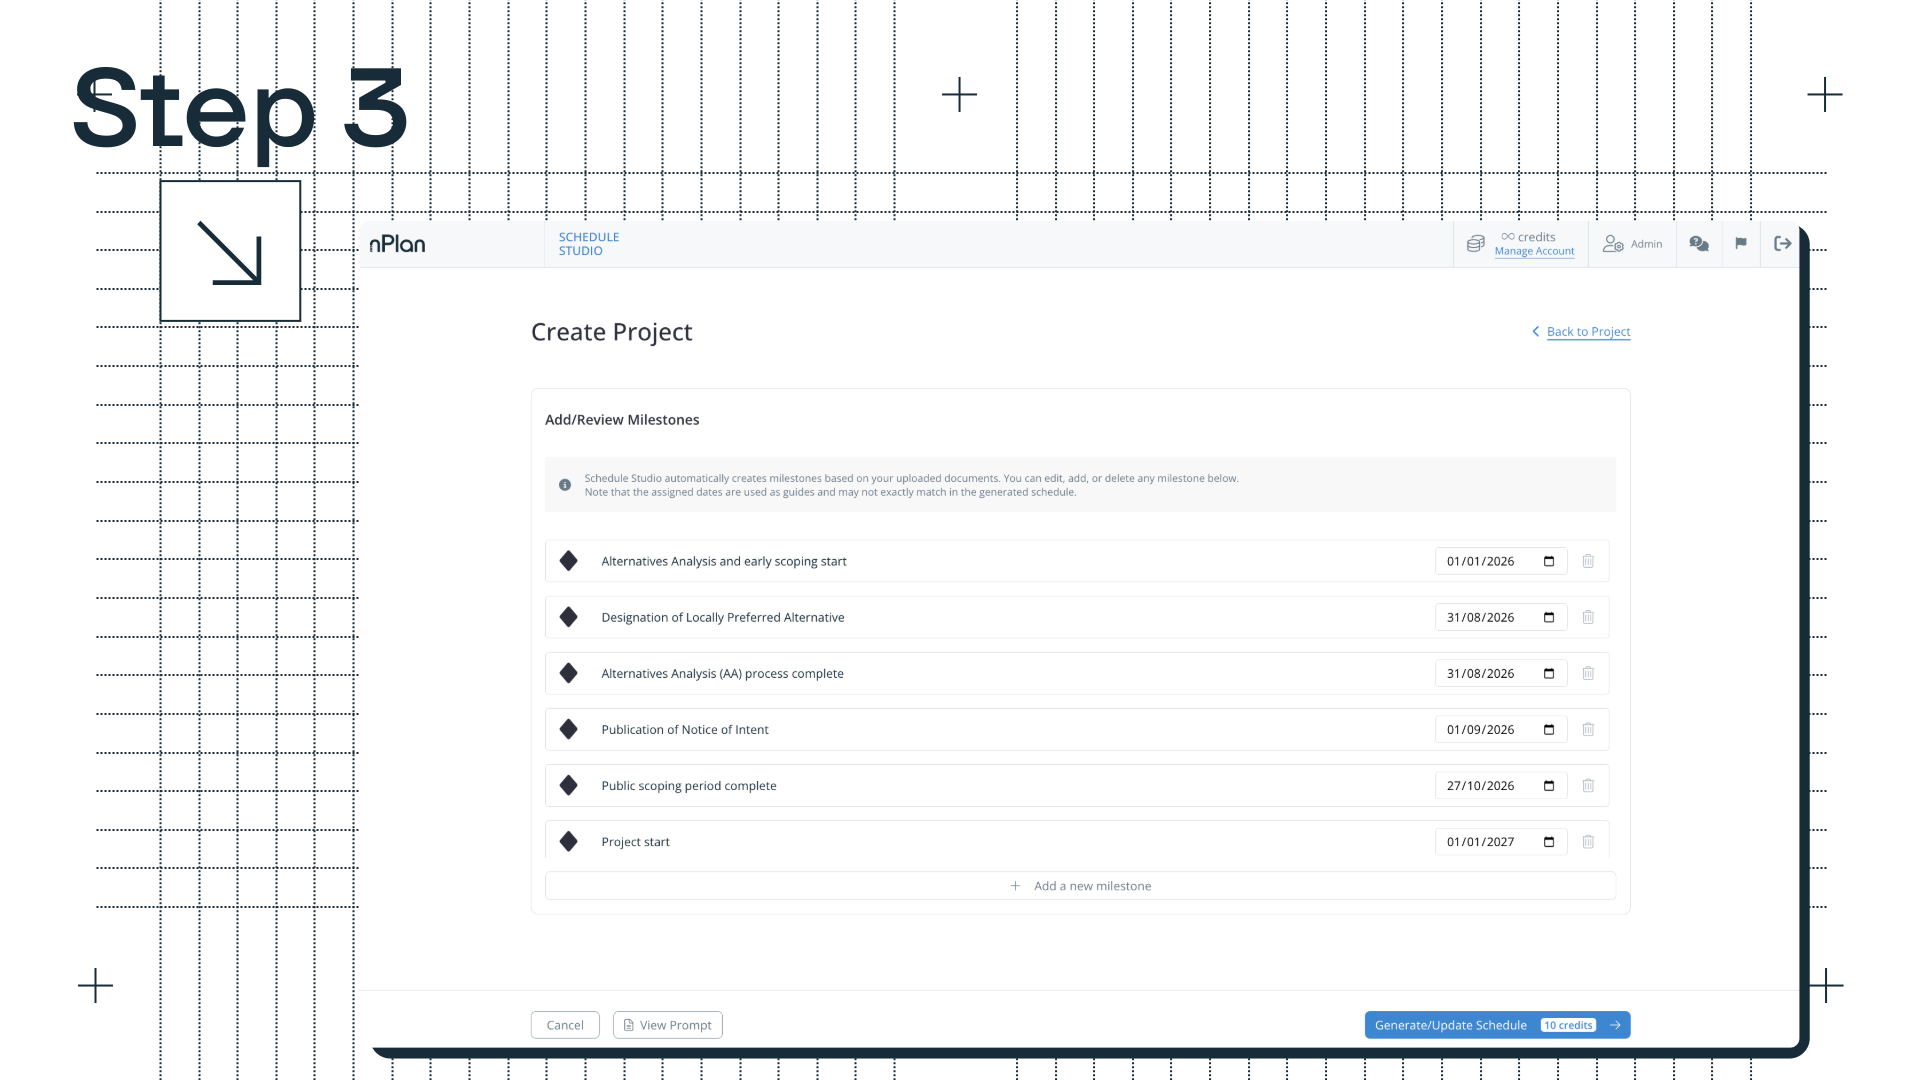
Before the schedule is generated, you confirm the key milestones. These are not fixed defaults, you can define your own to match the actual structure of your project: stage gates, handover points, contractual dates, or whatever the schedule needs to reflect.
Getting milestones right at this stage means the generated schedule is structured around what the project actually needs, not a generic interpretation of what a project of this type usually looks like.
Step 4: Generate and review
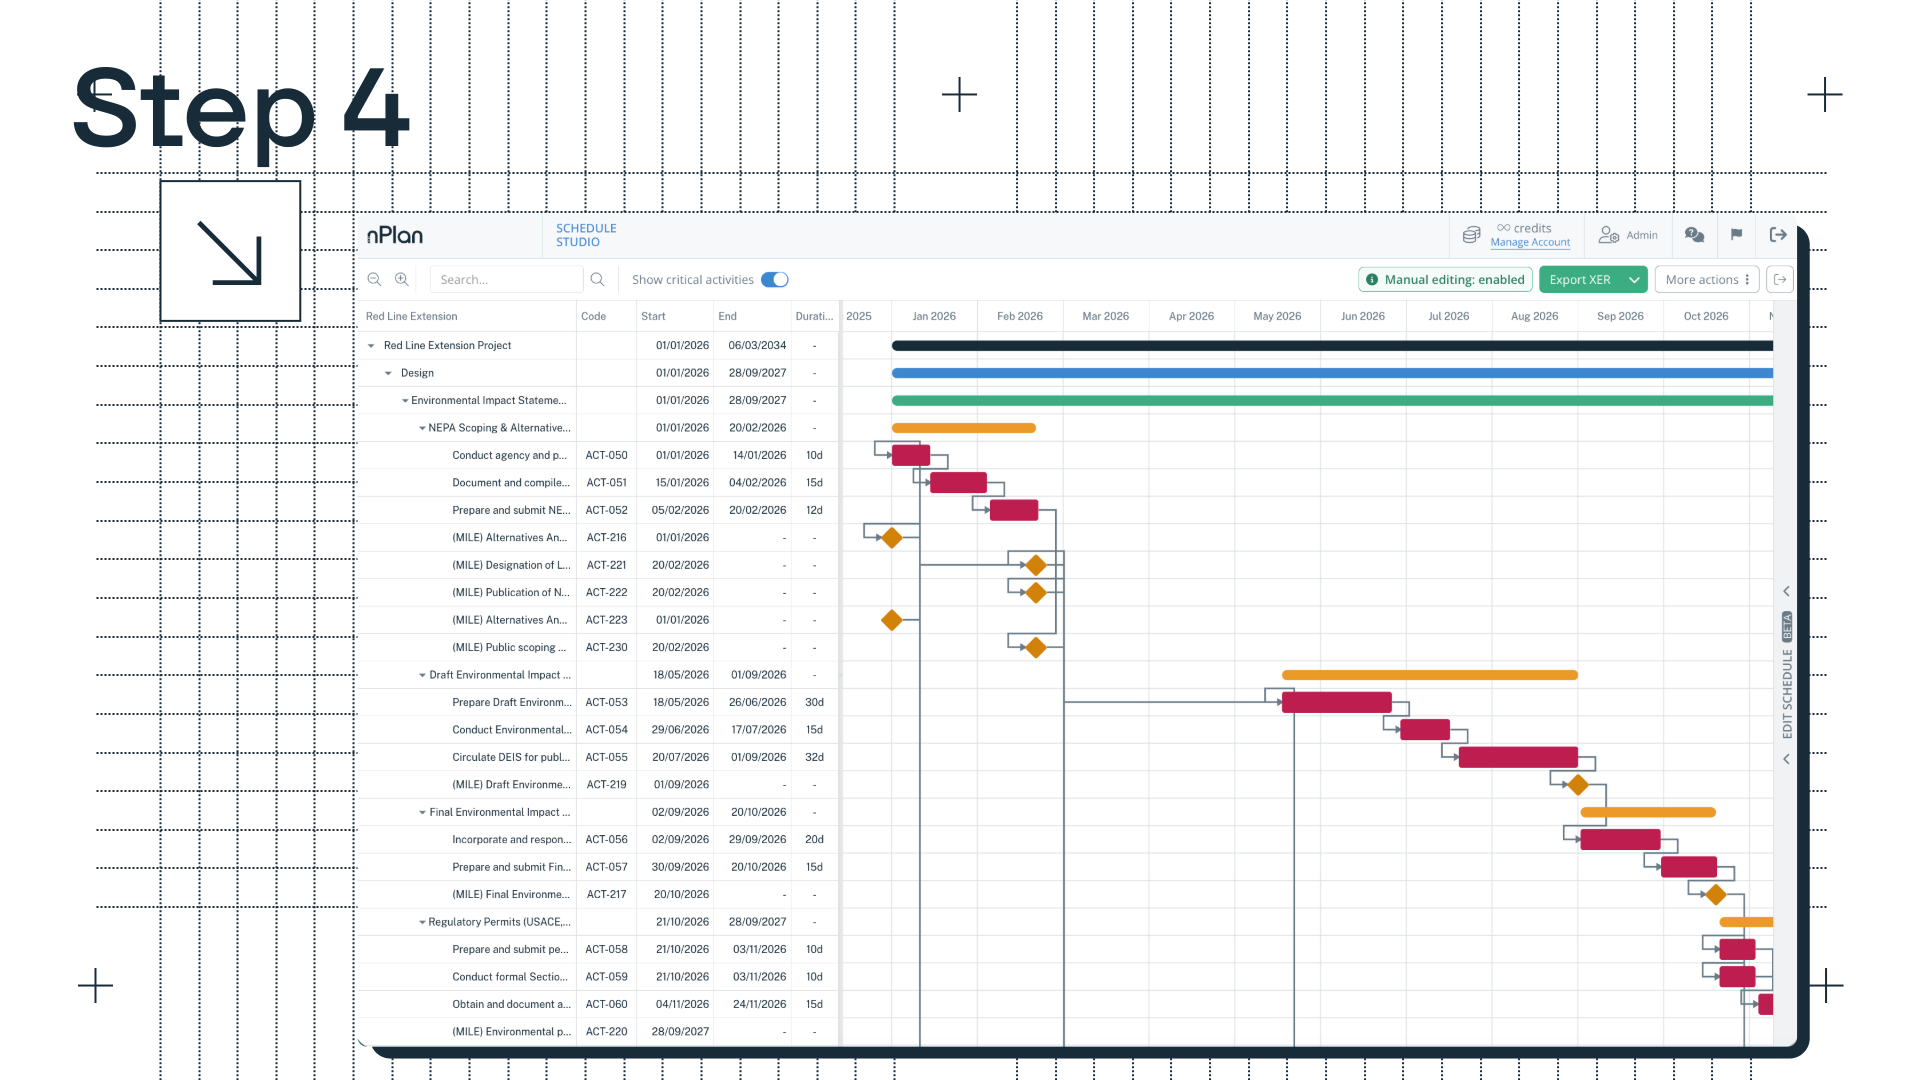
With documents uploaded, WBS shaped, and milestones confirmed, Schedule Studio generates your schedule.
The first output is a high-level schedule: phases, milestones, and top-level activities that give you an immediate read on the project’s shape and timeline. This is enough to make a go/no-go call at the early feasibility stage, or to sense-check whether the schedule is realistic before going further.
From there, you have two options. You can expand individual activities into sub-tasks, useful when you want more granularity in a specific part of the schedule, without rebuilding the whole thing. Or, you can expand the whole schedule at once, taking it from a high-level outline to a fully detailed schedule in one step.
Step 5: Edit and refine

The generated schedule is the first 80%. The rest is yours to refine: tweaking the logic, adjusting the sequencing, making it work exactly the way your project needs to run.
There are two ways to do this. You can edit individual activities directly on the Gantt: adjust names, durations, labour hours, and dependencies. Or, you can describe changes in plain text and let Schedule Studio apply them - particularly useful for broader structural changes like resequencing a section, parallelising activities, or adding a new work package.
If you want to explore a different delivery scenario without touching your current schedule, you can use the Iterate feature to create a named variation. You can go back and edit the prompt, the WBS or the mileston
What you get
When the schedule is ready, it exports directly to Primavera P6 as an XER file, or to MS Project as an XML file. Schedule Studio produces the starting point, and then you finish it the way you want to (in a fraction of the time it’d usually take).
The expertise still belongs to you, Schedule Studio just gets you to the point where that expertise can actually be applied, without the week of manual work that used to come before i
Schedule Studio is available now. Try it for free here, or get in touch with our team to find out more.


.jpg)


